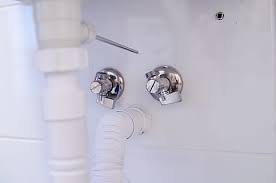
Introduction
When it comes to essential household fixtures, the toilet shut-off valve often goes unnoticed until it’s needed. This inconspicuous yet crucial component plays a significant role in controlling the water supply to your toilet. Understanding its function, importance, and proper maintenance can save you from potential water damage and plumbing headaches down the line. In this article, we’ll delve into the world of toilet shut-off valves, shedding light on their purpose and offering insights into how to maintain them effectively.
**1. The Role of a Toilet Shut-off Valve
The toilet shut-off valve is a small but mighty device located behind your toilet. Its primary function is to control the flow of water to the toilet tank. In emergency situations, such as a leak or a malfunctioning toilet, this valve allows you to quickly cut off the water supply to prevent flooding and water wastage. It acts as a first line of defense against potential plumbing disasters.
**2. Types of Toilet Shut-off Valves
There are two main types of toilet shut-off valves: traditional and modern quarter-turn valves.
- Traditional Valves: These valves are older in design and require several turns to fully shut off the water supply. They often have a round wheel-like handle that needs to be rotated several times to stop the flow of water.
- Quarter-Turn Valves: More modern shut-off valves require only a quarter-turn of the handle to completely shut off the water. They are typically more reliable and easier to operate than traditional valves.
**3. Importance of Regular Maintenance
Like any other household fixture, toilet shut-off valves require maintenance to ensure they function correctly when needed. Neglecting maintenance can lead to issues such as corrosion, leaks, and difficulty in shutting off the water supply.
**4. Simple Steps for Maintenance
Maintaining your toilet shut-off valve doesn’t have to be complicated. Here are some simple steps to keep it in optimal condition:
- Visual Inspection: Regularly inspect the valve for any signs of corrosion, mineral buildup, or leaks. Addressing these issues early can prevent more significant problems.
- Operational Check: Test the valve by turning it on and off a few times. Ensure that it operates smoothly and doesn’t stick. If you encounter resistance, it might be time to replace the valve.
- Lubrication: Applying a silicone-based lubricant to the valve’s handle and moving parts can help keep it functioning smoothly.
- Emergency Shut-off Practice: Familiarize yourself with the shut-off valve’s location and practice turning it off. In a plumbing emergency, you’ll want to do this quickly, so being prepared is essential.
**5. When to Consider Replacement
Despite regular maintenance, there will come a time when your shut-off valve needs replacement. Signs that it’s time to swap out the old valve for a new one include persistent leaks, difficulty turning the valve, or visible signs of corrosion that cannot be remedied.
**6. Calling in Professionals
If you’re unsure about performing maintenance or replacement yourself, don’t hesitate to call in plumbing professionals. They have the expertise and tools to handle shut-off valve maintenance and replacements effectively.


