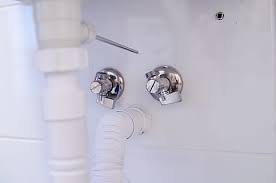
We’ve all faced those unexpected plumbing issues that leave us feeling flustered and uncertain. One crucial tool that can save the day during a toilet-related crisis is the toilet shut-off valve. This seemingly humble component is your first line of defense when it comes to tackling toilet troubles. In this guide, we’ll delve into the world of shut-off valves, learning how to use and maintain them to troubleshoot toilet woes effectively.
Understanding the Importance: Imagine this scenario: you hear an ominous gurgling sound coming from your bathroom, only to find water seeping out from under the door. In times like these, the shut-off valve becomes your best friend. This unassuming device, usually located near the toilet’s base or on the wall behind it, allows you to control the flow of water to your toilet. Whether it’s a minor leak, a clog, or a full-blown overflow, the shut-off valve gives you the power to halt water flow and prevent further damage.
Working with the Two Types: To navigate the world of shut-off valves, let’s explore the two common types and their operation:
- Compression Valve: Recognizable by its circular handle, this valve requires you to turn the handle clockwise to shut off the water. It operates similarly to a faucet.
- Quarter-Turn Valve: This modern iteration boasts a lever-style handle. To stop water flow, simply turn the handle 90 degrees, ensuring it’s perpendicular to the water pipe.
Steps to Operate: Knowing how to operate your shut-off valve is key to tackling unexpected toilet issues effectively:
- Locate the Valve: Familiarize yourself with the valve’s location – it’s usually near the toilet’s base or on the wall behind it.
- Shutting Off the Water: For a compression valve, gently turn the circular handle clockwise until it’s tightly closed. If you have a quarter-turn valve, a simple 90-degree turn of the lever is all it takes.
Proactive Maintenance: Like any essential household component, regular maintenance is crucial to keep your shut-off valve functioning smoothly:
- Routine Operation: Turn the valve on and off a few times every six months. This prevents sediment buildup, ensuring the valve remains easy to operate.
- Visual Checks: Regularly inspect the valve for signs of corrosion, leaks, or rust. Check the surrounding area as well. Address any issues promptly.
- Replacement Consideration: If you notice the valve is aging, corroded, or isn’t functioning as it should, it might be time for a replacement. Seeking advice from a professional plumber is wise in such cases.
- Emergency Preparedness: Educate everyone in your household about the valve’s location and operation. In a plumbing emergency, quick action can minimize damage.


